Sunday, February 23, 2014

Kitchen Progress


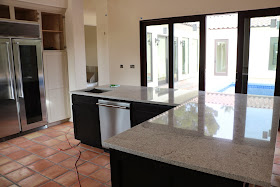
The kitchen is almost done. Just a few details left to finish, but I'm so happy with the way it's turning out. It's just how I pictured it in my mind over a year ago.


vigo undermoujnt stainless steel sink


vigo stainless steel sinks

Vigo under-mount stainless steel sinks


vigo sinks, undermount stainless steel sinks, vigo undermount stainless steel sink, stainless steel sink


spring faucet, single tub stainless steel sink


Cabinet trim added. Cupboard doors on fridge cabinet  were taken back to the shop to get trimmed, they were hitting the fridge and a few pieces of trim are still missing on the bottom of the island.


Installing appliances:

During...


After...

allen and roth adjustable arm wall light, lowe's swing arm wall light, allen + roth wall light


glass door fridge, wolf range, thermador dishwasher, marvel refrigerator
Refrigerator is a Marvel Professional 42". Stainless interior and the glass door are options.


wolf dual fuel range 36"
 Above is the Wolf dual fuel 36" six burner range.
The piece of black granite that sits to the right of the range was too wide, it will need to be re-cut.


Thermador dishwasher.
 Microwave goes in the opening to the right with the yellow wires.


 And below is that picture I made on the Ikea kitchen planner over a year ago:

ikea kitchen planner
It was so helpful to use that program to plan my kitchen. Even if you aren't going to buy anything from Ikea, most of the sizes of appliances and cabinets are the same no matter where you go. I also used it to plan all  my window sizes and heights.  I can't say enough great things about the Ikea planners, they are so helpful. I'm using the kitchen planner again now to plan the laundry room and I used their office furniture planner to plan the office.


proline pro v 36" range hood and chimney
 range hood waiting to be installed


Obviously the arm lights are not installed. They will be hardwired in if I keep them. I just have them hanging to see if I like them.


bianco montahna granite, black granite countertops, wolf range, marvel refrigerator, glass door refrigerator
 A beverage fridge goes in that opening on the left wall of cabinets.


Here's a picture of the kitchen from two months ago:

kitchen cabinets under construction


***

Granite Countertops


The granite countertops are in and look great. I had planned on the countertops coming right up to the window ledge, but had the cabinets built just short of the ledge with a 3cm top on them because I thought it would look better to be just below the window ledge vs. higher that the window ledge. Well, for the first time this build, it worked out absolutely perfectly! The granite meets the window ledge EXACTLY!! The piece next to the range is a bit too wide and needs to be trimmed down, but other than that everything looks great! All counters are 3cm thick.

This is the second time I've used black granite. Besides the fact tht it shows every speck of dust, I really like black. Even though all black granite essentially looks the same, every piece is unique and different, this particular piece had a lot of mica, or small pieces of minerals in the granite that polish differently and look sometimes like water stains if you look at it from a certain angle. I really like the inconsistencies of having a natural stone but I wanted to lessen the water stain look so I used a black polish to take some of the glare away.


Below is the granite before the black polish. The bits of mica are  dull and  look like water spots.

pieces of mica in black granite, look like water spots on black granite


After the polish.


I used kiwi black shoe polish. Rubbed it in everywhere and then buffed it off with a soft towel.

polish black granite


Window ledge and granite


The island has granite called Bianco Montahna. I really love the look of carrera marble, but I know how fragile it is and how easily it stains and this island will be used a lot and need to hold up to some abuse. Bianco Montahna is a close alternate to marble. Up close it has some reddish pink spots and greys and browns.

bianco montahna granite

Here's a picture of it magnified where you can see the reddish spots:


light colored granite, white granite, bianco montahna granite


light colored granite, bianco montahna granite

Tile and Bathroom Progress


The drywall wizard, Luis, came out and repaired some of the hairline cracks in the drywall and fixed that area next to my bathtub that needed work. 


 After Luis's handy work


 Still need to attach the  marble plate in front of the bathtub and finish the baseboards.


Toilets are in.


Brackets that hold the Kohler Brockway sink in the boys' bathroom.

kohler brockway sink brackets, brockway sink install


allen and roth vanover bathroom vanity

Lowe's allen + roth vanover vanity

Sealing Saltillo Tile

** I also have a tutorial on how to strip & seal saltillo tiles here :)


The tile is finished and was cleaned with vinegar to remove some of the hard water stains that the tiles had from being soaked in water to make cutting the tiles easier. Then I sealed with a Behr sealer. I have two coats in the kitchen to protect the floor from all the appliances being moved around and one coat on the rest of the house. It will probably need a total of 4 coats to get a good seal.


saltillo tile

 Some of the lime and hard water that's on the tile after the wet cutting. I just wiped with undiluted vinegar a couple of times and it vanished.


An example of the excellent detail work from Leonardo, the tile installer.


This sealer is water based so it is really easy to work with and clean up.


It's from The Home Depot. I chose high gloss wet look, but they also have a flat matte look too.


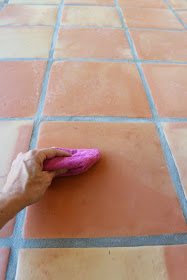
For the first coat I use a microfiber cloth on the tile and a brush on the grout lines. The rough grout lines tear up a cloth pretty fast so I found it easier with the brush. Also because the tile is so porous, the first coat uses a lot of product and didn't go on nicely when I used a mop. So the first layer of sealer I applied using a rag and a brush for grout lines, then the tile is sealed enough for the second, third and fourth coats to go on nicely using a mop.


sealing saltillo tile


 Half the room with the sealer. This sealer darkens the tiles as if they were wet.

saltillo tile seal befor and after

 Top tiles have the sealer, bottom tiles are how they look without


The outer ring with sealer


 The milky looking tiles are the tiles without the sealer


saltillo tile

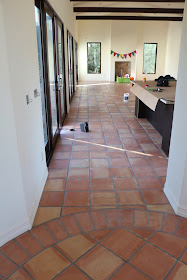
 The look after all the tiles have been sealed.

sealing saltillo tile