So, this never happens, but I had two days to myself. No kids, no husband. Just me and my tile! And we had a great time!! Here are some pictures of the party! It wasn't really a party, but you know what I mean?! What I love about these tiles is that they were handmade, each is a slightly different size, so there is no PERFECT here. Stress free!
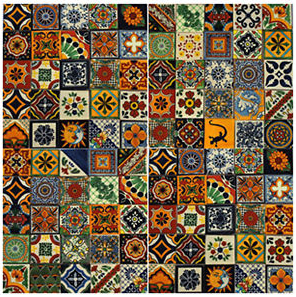
This is the eBay picture of the tile mix I ordered. They say that this is a sample of what you MAY get. My order came pretty close to this.
Because I had about 13 different patterned tiles I wanted to see the layout on the floor first so that I wouldn't have the same tile end up on top of or diagonal itself in any of the three rows. This seems like a simple thing to do but for some reason I spent an hour moving the tile pattern around to get it just right.
Removed outlet covers and taped off the counter.
Applied tile adhesive to wall. It dries fairly quickly. So make sure to only apply an area that you can cover within thirty minutes.
The adhesive I used. From Home Depot.
When cutting a tile I taped it to prevent the cut edge from chipping and it gave a nice clear place to mark the area I needed to cut. Cut your tiles with the good side facing UP.
This is what your cuts will look like if you turn the tile good-side-down on the wet saw.
The wrong side will have the nice cut edge.
These tiles were all handmade making each one a slightly different size, so I did not use spacers. I just eyeballed it.
Here you can see that I used some spacers sideways just to keep the tiles from slipping down. I also added the SUN at the outlet behind the coffee maker as some comic relief. There were three different sun tiles which sorta had expressions that gave me the creeps!
I let it sit for a day before applying the grout.
Mix powder with enough water to give you a non-pourable mixture. Here, gravity is NOT your friend. This was a mess! Don't be shy with this. Also, do NOT protect your counter with tape or anything else! You will not be able to remove it without ruining your grout seam. It will be messy. Just embrace it.
 | |||||||||||||
I found using my fingers to push the grout in the spaces worked better that my tools.
Scrape off all the excess and then use a clean wet sponge to get the rest off the face of the tile and to smooth out the grout lines. It's consistency is like clay at this point.
Let dry for a couple of hours then you can buff the tiles with a soft dry cloth.
Finished!!! Easy peasy!
One small note: As a kind-of-frame I added strips cut from the same blue and white tile to the ends and to the top of the third row.
I had some extra and moved my party into the bathrooms. I'm not sure which is worse...letting a project go too far or burning out halfway through???


